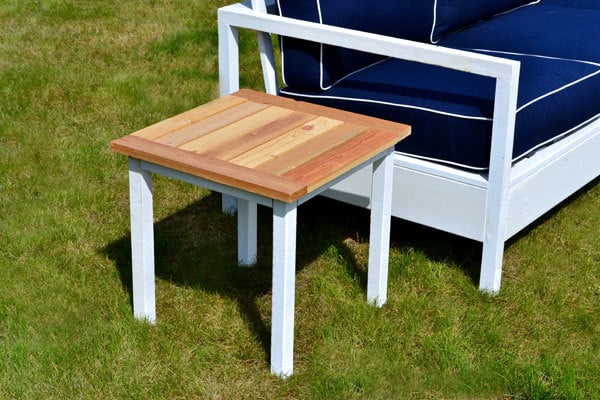

Free simple easy step by step project plan to build a Restoration Hardware inspired end table. Features simple design, slatted top with breadboard ends.
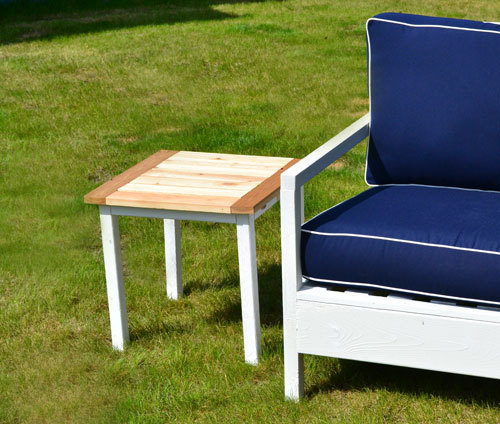
I really feel the silver lining of DIY furniture is in your scrap pile. As any project builder will tell you, what you can make for free from your scrap pile is the sweet spot.
Take this end table. It's built to match the Simple White Outdoor Collection, inspired by Restoration Hardware's Nantucket Collection, and it's made from scraps leftover from the Simple White Outdoor Sofa. For free! Yipee!
And it wasn't until after I built this end table (my very first outdoor end table that I own) that I realized just how useful they are. Because I tell you, we are spending quite a bit of time on our sofa, and it's nice to have a spot to set your drinks, laptop, phone, or book.
So save those scraps, you might just have an end table in your pile of leftovers. Freebies rock! Dimensions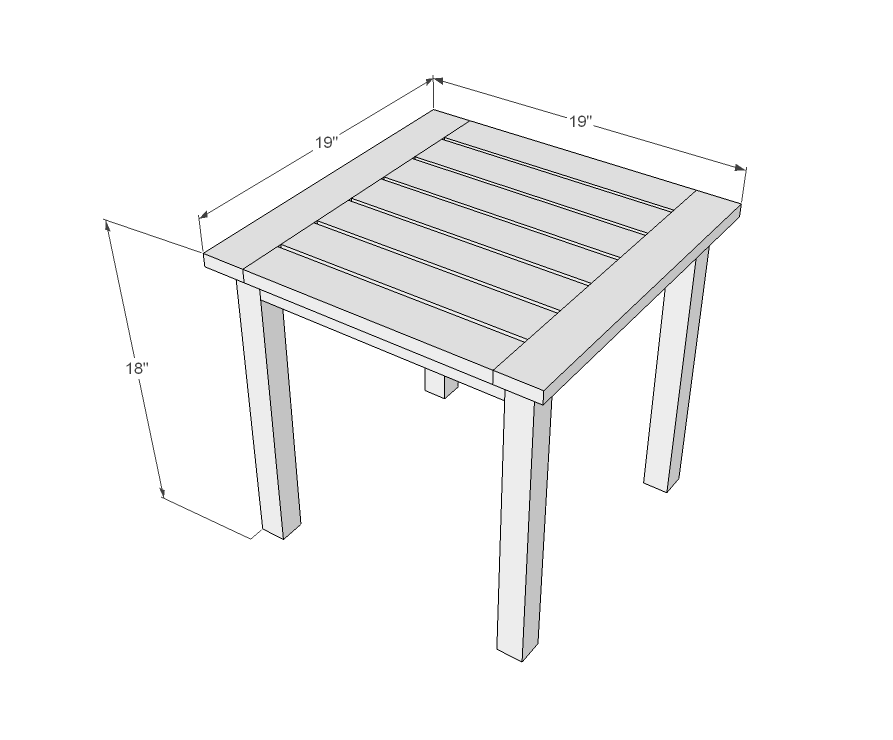
4 - 2x2 @ 17 1/4" (Legs)
6 - 2x2 @ 14" (Supports and Aprons)
2 - 1x3 @ 19" (Breadboard Ends)
7 - 1x3 @ 14" (Tabletop Boards)


Please read through the entire plan and all comments before beginning this project. It is also advisable to review the Getting Started Section. Take all necessary precautions to build safely and smartly. Work on a clean level surface, free of imperfections or debris. Always use straight boards. Check for square after each step. Always predrill holes before attaching with screws. Use glue with finish nails for a stronger hold. Wipe excess glue off bare wood for stained projects, as dried glue will not take stain. Be safe, have fun, and ask for help if you need it. Good luck!
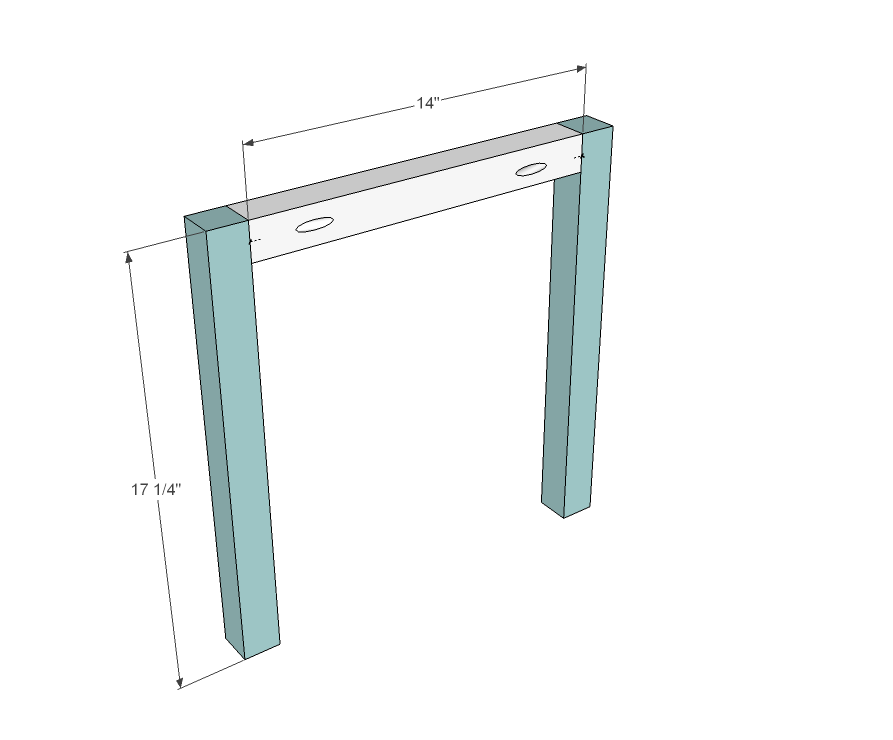
Build two legs as shown above. You can use the Kreg Jig set for 1 1/2" stock and 2 1/2" pocket hole screws or simply use 2 1/2" screws countersunk and wood glue.
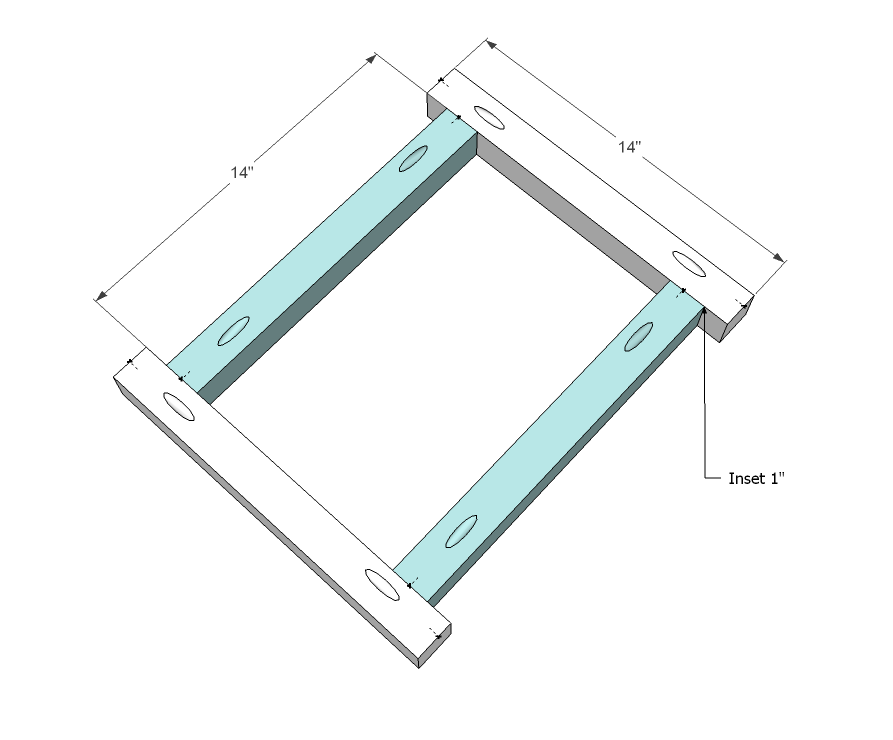
Tabletop Frame. Build the tabletop frame as shown above. Again, pocket holes or 2 1/2" screws and glue.

Attach legs to frame as shown above. Hide pocket holes to the inside if used.
For Kreg Jig users - skip to step 6.
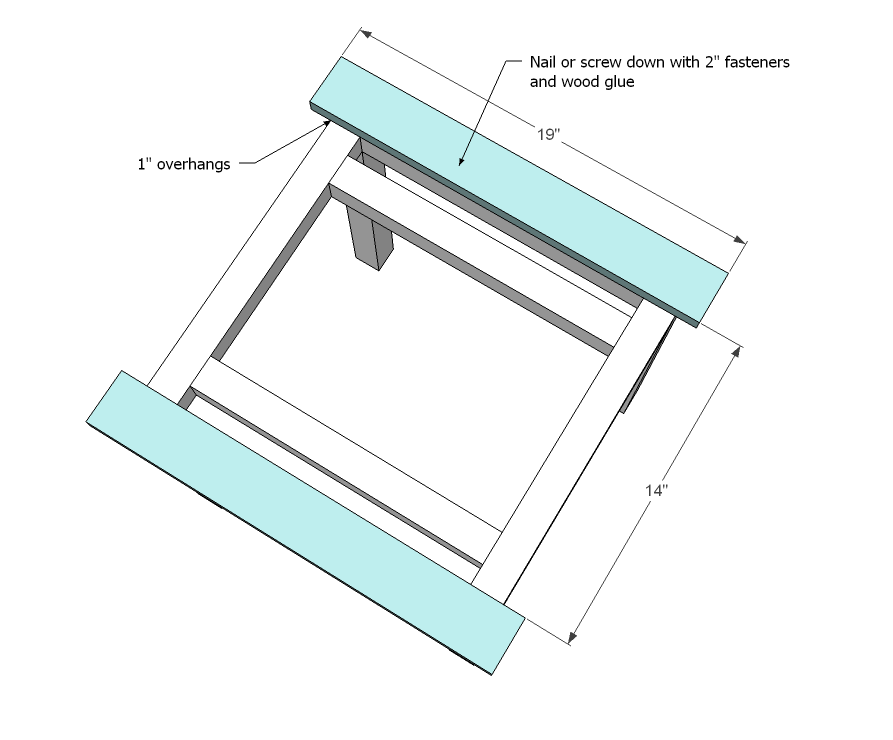
Attach breadboard ends as shown above, flush to the inside of the apron. Nail or screw down with glue and 2" fasteners. You could alternatively screw from underside to hide screw holes.
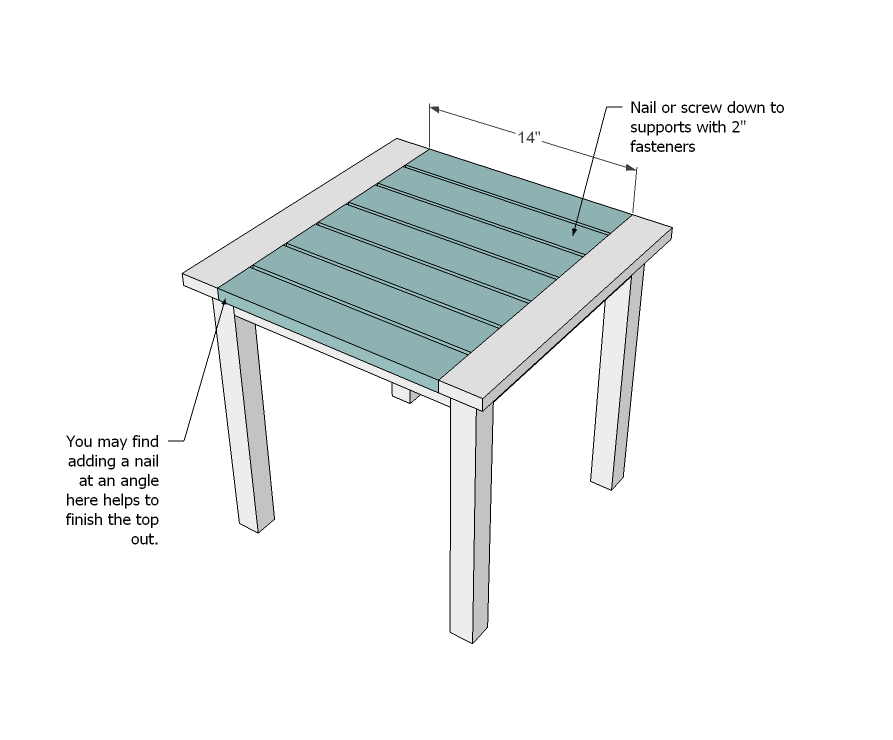
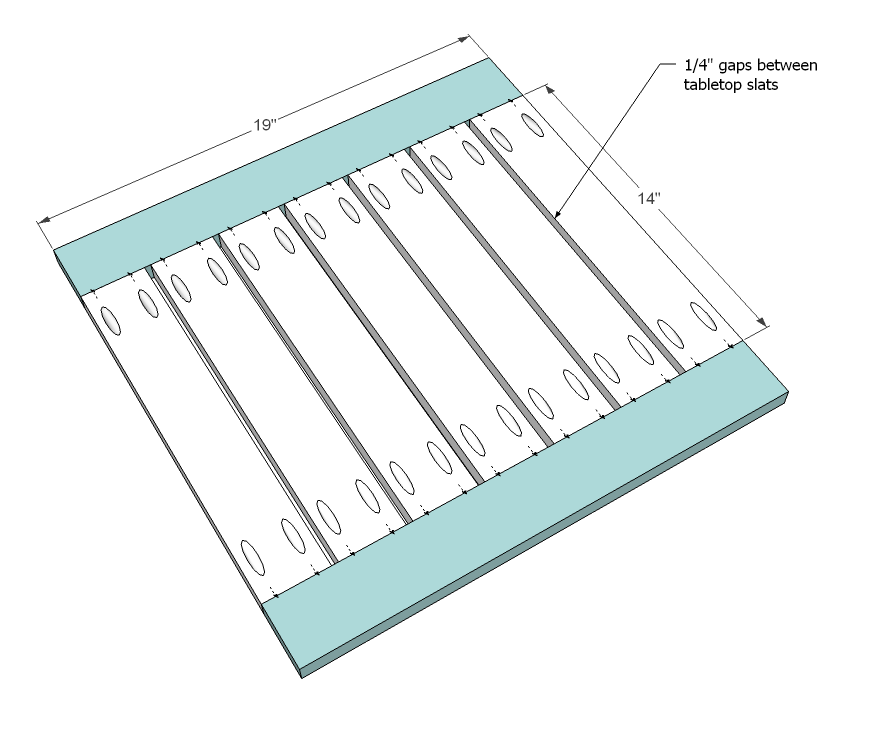
For Kreg Jig users, set your jig for 3/4" stock and attach tabletop boards to breadboards with 1 1/4" pocket hole screws and wood glue.

Then use 2" screws to attach base to tabletop, concealing pocket holes on the underside.
Finishing Instructions Preparation InstructionsFill all holes with wood filler and let dry. Apply additional coats of wood filler as needed. When wood filler is completely dry, sand the project in the direction of the wood grain with 120 grit sandpaper. Vacuum sanded project to remove sanding residue. Remove all sanding residue on work surfaces as well. Wipe project clean with damp cloth.
It is always recommended to apply a test coat on a hidden area or scrap piece to ensure color evenness and adhesion. Use primer or wood conditioner as needed.
Project TypeGuest (not verified)
Mon, 06/13/2011 - 12:19
Thank you so much for this collection, I can't wait to build every piece!
Tue, 06/14/2011 - 18:59
Hi Ana: Thanks for posting another part of this collection. I really like that in more recent plans you are including where to place the Kreg Jig pocket holes. most of the time! I have a great deal of difficulty figuring out where to drill the pocket holes. (I am a beginner!)
For example, on step 3 how would you do the pocket holes to attach the legs? And would this require using the Kreg Jig in a "repair tool" mode? Perhaps if you did a post about joining techniques? (I have watched the DVD that came with the Kreg Jig over and over and I still can't figure it out. LOL).
Oh, and this plan doesn't say in the supply list what type of screws or nails are needed.
And one more question: what size screws should I be using? (I don't mean length; I mean like number 8's or 12's or doesn't it really matter?
Okay, I lied. I've got another question! How many screws should be used to attach something? For example, in step 7 how many screws would be put into each side to attach the base to the tabletop? Is there a general rule - like one every 3 inches?
Tue, 06/14/2011 - 20:22
Hi Carol, I agree, it's high time we did some Kreg Jig how-to posts! I'm so happy that you went with a Kreg Jig, I find I'm happier with the projects built with the Kreg Jig.
On step 3, you would use the pocket holes shown in the drawing in step 2. The pocket holes would be placed on the underside to prevent water pooling in the pocket hole, creating damage to your project later on. Thus you can't see the pocket holes in the step 3 diagram.
I did not realize the plan did not have screws listed. For 1 1/2" stock, use 2 1/2" pocket hole screws.
For screws, I buy the Gold Screws, available at just about any hardware store in common lengths.
So how many screws really depends on your project and use. At least put screws on both ends, and then every 6-8 inches. But you are the best judge of strength - if you project seems like it needs "beefing" up, add more screws.
I hope this helps! Good luck, and thank you!
Wed, 06/15/2011 - 07:53
Oh! I see the pocket holes that are on the white parts of step 2 are used to attach the legs to the frame. So should all of the pocket holes get drilled on all of the various pieces before they are ever connected? (i.e., drill the pocket holes in the white pieces in step 2 before they are attached to the green pieces). I know, this is a dumb question! (I'm asking it anyways!)
thanks,
--Carol
Brad K (not verified)
Fri, 09/14/2012 - 19:02
I liked the table and decided to make one with all the leftover 2x4 wood I have from the framing of the basement. So it took me a few hours and it only two materials 2x4 wood and framing nails! No glue. Real sturdy. Now I need to sand it and finish it.
Tue, 01/17/2017 - 07:22
I am a novice woodworker, and I would like to build this table (and possibly other projects) using PVC trim boards. Assuming they come in the correct sizes, is there any reason I could not or should not try this?
Tue, 01/17/2017 - 07:33
I am a novice woodworker, and was wondering if this plan could be built with PVC trim boards, assuming they come in the correct sizes. Is there any reason this could not be done? Thanks, Mitch